

One sure method to increase your newsletter subscriber membership is to offer a discount to those customers who have already signed up to your subscriber list. This is useful in cases whereby you need to have more subscribers, that you can send regular newsletters to, about your products and services, and other offers.
Setting this up for your MailChimp, SendInBlue or NewsletterPlugin subscribers is possible and quick using our Conditional Discounts for WooCommerce. For this tutorial, we will focus on MailChimp, but bear in mind that all the steps are valid for SendInBlue and NewsletterPlugin newsletter engines as well.
Table of Contents
What do I need to create a discount for my Newsletter Subscribers?
For the MailChimp and SendInBlue newsletter engines, you will have generate an API key from your accounts on their sites. This API key is what will connect your newsletter account to your store, to validate the subscribers for the discounts you set up. The Newsletter plugin is a bit easier, because it integrates with your WooCommerce store directly, and sits in your site.
What do I need to create a discount for my MailChimp Subscribers?
- Generate the MailChimp API key from your MailChimp account. Copy it.
- Go to your WooCommerce store, on to Discounts > Settings.
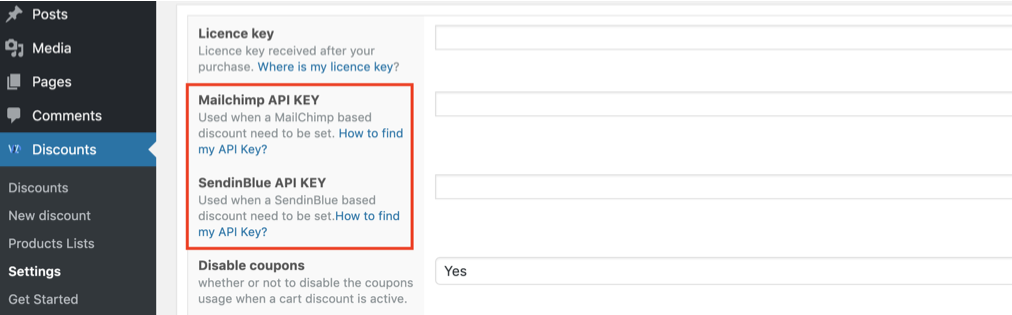
- Paste the API key into the field named “MailChimp API KEY”. Save your changes.
- Proceed to the section “How do I create a discount for my Newsletter Subscribers?“.
What do I need to create a discount for my SendinBlue Subscribers?
- Go to your SendInBlue account and generate your SendInBlue API key. Copy it.
- Go to Discounts > Settings in your WooCommerce store.
- Look for the “SendinBlue API Key” field, and paste the generated API Key in it. Save your settings to update it.
- Go to the section “How do I create a discount for my Newsletter Subscribers?“.
What do I need to create a discount for my Newsletterplugin Subscribers?
- Ensure you have WooCommerce installed and activated.
- Setup your Newsletter Plugin by downloading and installing the Newsletter Plugin integration for WooCommerce add-on.
- You may also optionally set up the WP Users Integration add-on and the Newsletter API add-on.
- Go to the Discount section and implement the section “How do I create a discount for my Newsletter Subscribers?” below.
How do I create a discount for my Newsletter Subscribers?
- Click on Discounts > New Discount, to create a new discount.
- Add a befitting title that is descriptive enough for your customers to understand.
- Add other optional properties like start and end dates, repeat intervals, user limits, etc.
- Rules: Click on Add rules group to create a rules set.
- Select the rule “If customer subscribed to Mailchimp list”.
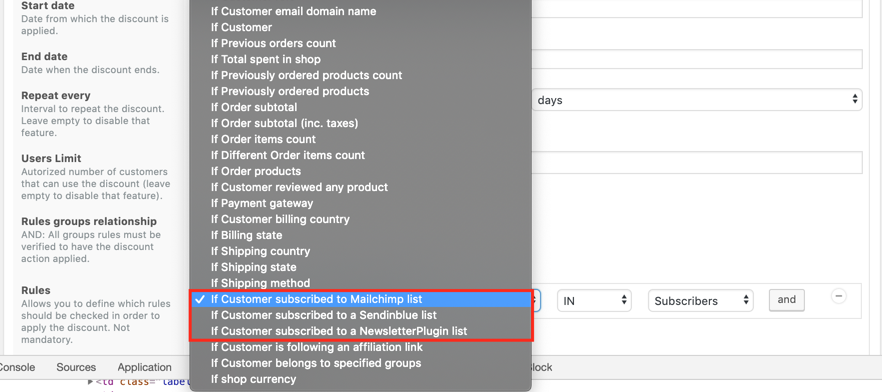 If the API you pasted in Settings is accurate, your selection changes the display to bring out an operator (IN, NOT IN), and a drop-down field of existing MailChimp/SendInBlue/NewsletterPlugin lists in your MailChimp/SendInBlue/NewsletterPlugin account.
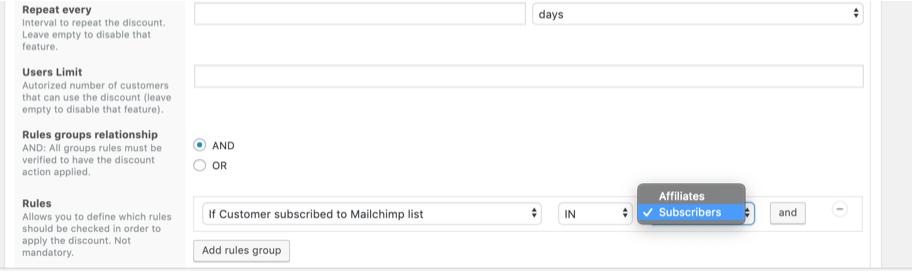 Make selections according to what type of discount you plan.
 - Add any other additional rule based on your preferences.
- Action: Select the type of discount you want to apply when the condition is met by a customer.
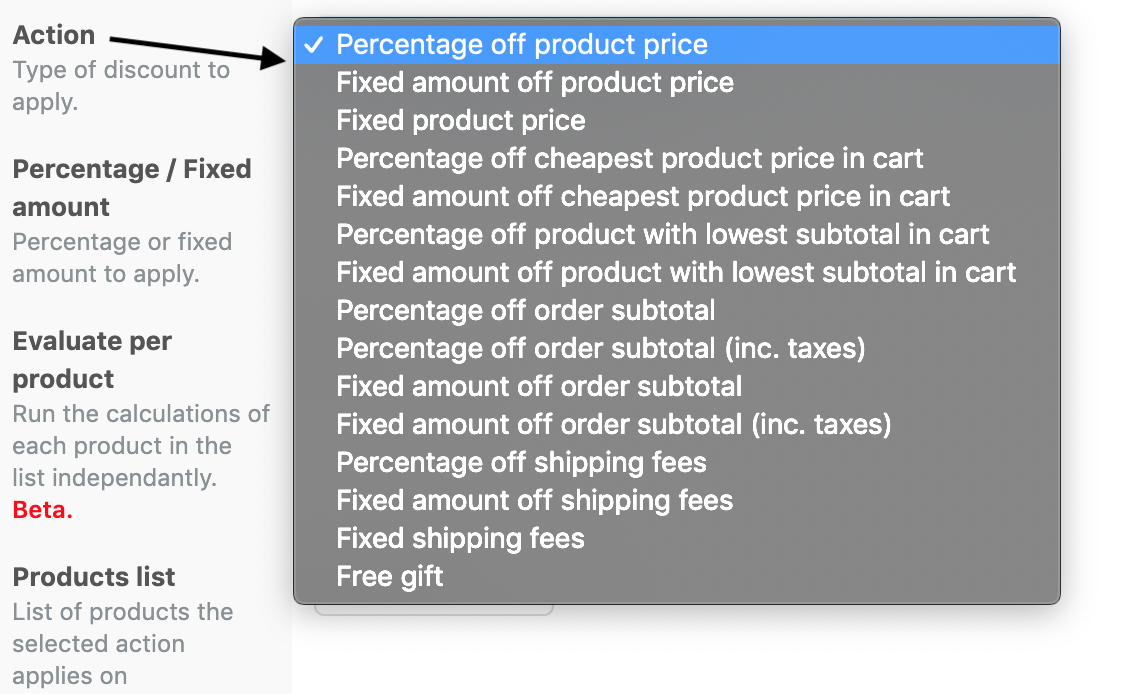
The possible actions can be grouped into five sets:- Product price: includes “Percentage off product price”, “Fixed amount off product price” and “Fixed product price”.
- Cheapest product price: includes “Percentage off cheapest product price in cart”, “Fixed amount off cheapest product price in cart”, “Percentage off product with lowest subtotal”, and “Fixed amount off product with lowest subtotal”.
- Order subtotal: includes “Percentage off order subtotal”, “Percentage off order subtotal (inc. taxes)”, “Fixed amount off order subtotal”, and “Fixed amount off order subtotal (inc. taxes)”.
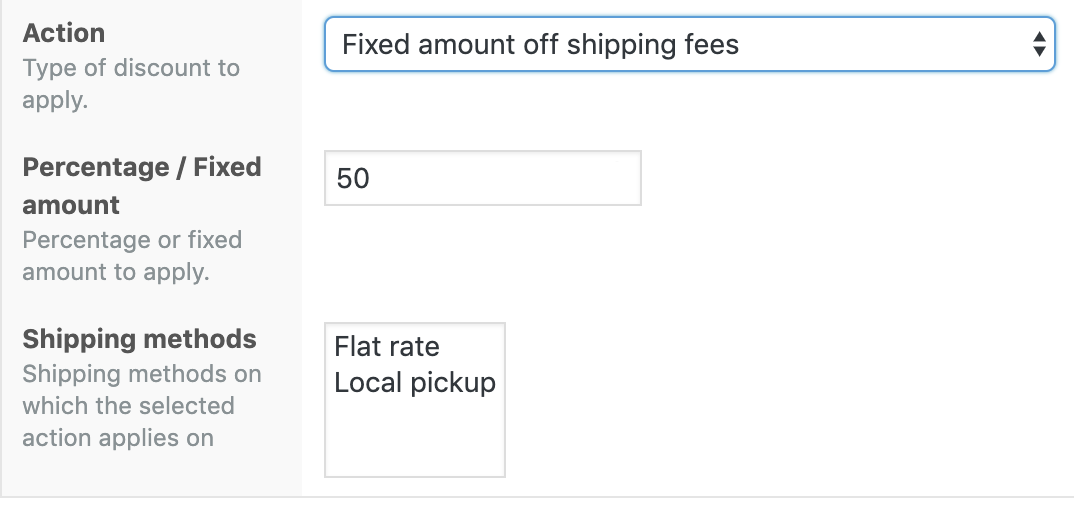
- Shipping fees: includes “Percentage off shipping fees”, “Fixed amount off shipping fees”, and “Fixed shipping fees”.
- Free gift: pertains to the discount type that gives the customer particular products for free.
If you selected the “Free gift” action, skip to step 13.
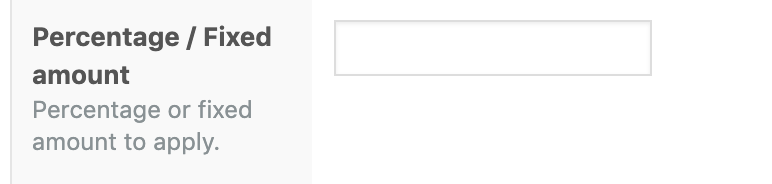
- Percentage/Fixed Amount: add the numerical value of the action you chose in the previous step. After adding this value, the next step you will take depends on what you selected in the previous one.
Your next action depends on section that you select:- Product price group, go to the next step.
- Order subtotal group, go to step 16.
- Pertains to shipping, go to step 15.
- Evaluate per product: lets you run the calculations of each product in the list independently. This feature is in BETA stage, so please use with caution. Go to the next step.
- Products List: this field displays all the created product lists that exist in your store so that you can choose one of them to be the list of products the selected action applies on.
If your chosen action was not under the Cheapest product price group, skip to step 12. - NB. Cheapest products: lets you determine how many products should products be considered when applying the discount on the cheapest products. Go to the next step.
- Disable on Product and Shop pages: choose whether to disable the display of discounted prices on all pages except cart and checkout. Skip to step 17.
- Gifts List: this field displays all the created product lists that exist in your store so that you can choose one of them to be the list from which the free gifts will be chosen. Select one of the product lists. Go to the next step.
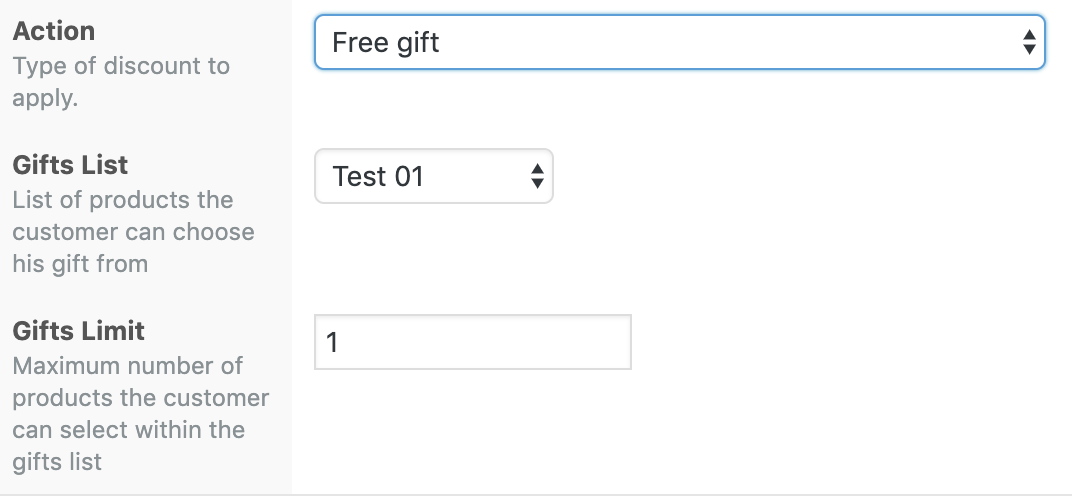
- Gifts Limit: this field allows you to limit the maximum number of gifts that a user can enjoy from this discount. Go to step 17.
- Shipping methods: this field lists the different shipping methods you have activated in your WooCommerce store. Select which of them that the chosen shipping action will apply on.
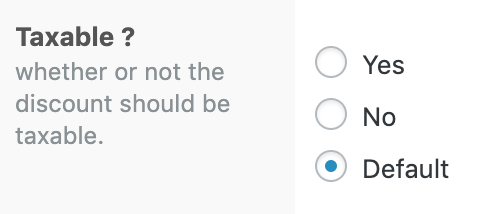
- Taxable: this field lets you determine whether or not the discount should be taxable. Go to the next step.
- Publish your discount. That’s it!
Conclusion
Please note that you can follow these same steps to achieve discounts for your subscribers if you use the SendInBlue or the NewsletterPlugin newsletter options, instead of MailChimp. Creating a discount for customers that have already signed up to your newsletter lists is a sure way to generate leads for your future campaigns AND get more products sold.
Hi, not sure how this works.. I set up the mailchimp discount and what next? Am I supposed to receive an email with a discount code or something?
How does this work?
Hello,
No the plugin automatically checks if the logged user email is subscribed to the selected list in the discount you’ve setup. If it is, then the discount is automatically applied.