

Sometimes you want to reward specific users, for their loyalty or even as winners in a competition on your site. Using our Conditional Discounts for WooCommerce plugin, you can sift through any number of registered customers on your site, and set up discounts personalized just for them.
Steps to create a discount for a specific customer
- Define your discount terms (rules and actions).
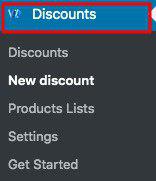
- Go to Discounts > New Discount to create a new discount.
- According to your discount terms, add values for Start Date, End Date, if needed.
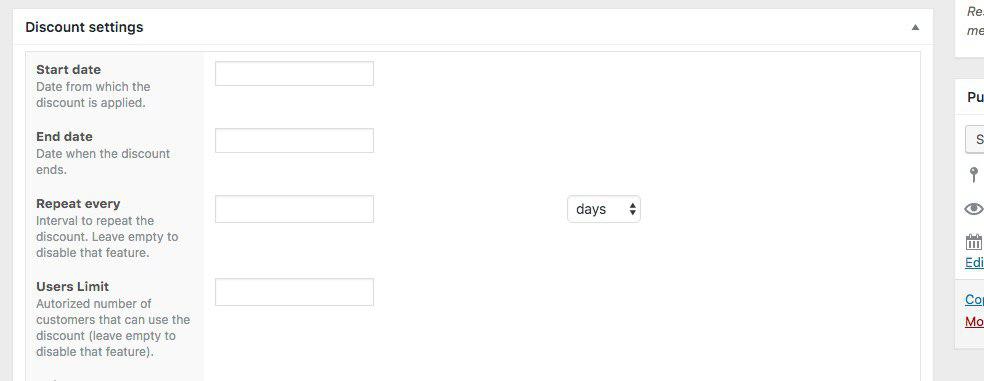
- Since this is about creating a discount for a specific customer, it is advisable to add a numeric value to the “User Limit” field.
- Depending on your discount terms, switch the value in the field “Rules groups relationship” to “AND” or “OR”.
- Rules: Click the “Add rules group” button.
- Select the “If Customer” rule from the dropdown list of rules.
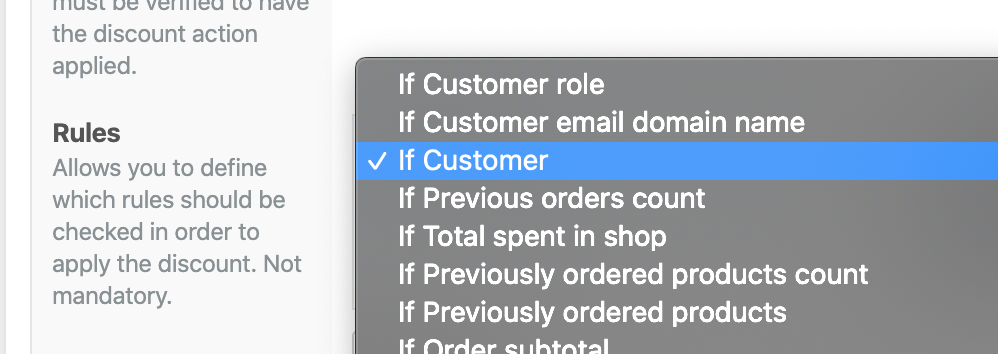
After the selection, the form will provide a list of all registered users (Usernames and emails) on your WooCommerce site. You can choose the specific user from the list.
- This step is necessary if you are combining the “If Customer” rule with other rules. Keep clicking the “Add rules group” button to generate more rules sets to add the other rules in your discount terms.
- Complete the rest of the discount setup by choosing the “Action” you determined in your predefined discount terms. Add a numerical value in the “Percentage/Fixed Amount” field (or the alternate “Amount” field that pops up, depending on the “Action” you have selected).
- Publish the discount.
That’s all you need to do to create a discount for a specific customer.
Note: This can also be used for more than one user, in which case you either add a value to the “User Limit” field equivalent to the number of users, or you leave it blank. Remember to select all the users in the 7th step.